This page describes the Post Expirator PublishPress Future metabox on the page editing screen. (Previous versions were called Post Expirator.) This box allows you to expire a post or page automatically. This could be useful if the page is time sensitivea page or post has a specific amount of time where it will be relevant or accurate. If you set up post expiration, you won't have to remember to remove the post/page after it is no longer relevant.
This is a feature that needs to be turned on specifically for each subsite on wisconsin.edu.  If you want to use this feature and don't see it on your pages or posts, submit a Web Request and ask to have the PublishPress Future plugin enabled on your site.
Step 1
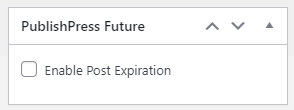
To set a post/page to expire automatically, check select the Enable Post Expiration option checkbox in the Post Expirator metabox on the right-hand side of the Edit Post/Page screen. By default, the checkbox is not selected.
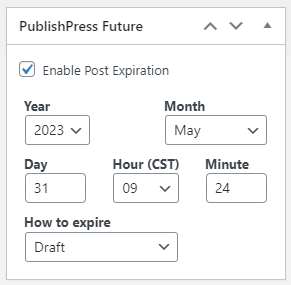
Once you select the checkbox, the options for expiring the page/post will appear. Select a date and time for the
Step 2
Select the Year, Month, Day, and time (Hour and Minute) for the page/post to expire.There
are three options for how to expire the page. You can change the status to Draft, so that is is no longer viewable on the Internet, but administrators can still view the page on the page list. You can expire the page by deleting it, so it Next, choose an option from the "How to expire" dropdown. There are 9 choices available. The recommended option is "Draft." This will unpublish the page/post but not delete it entirely, and administrators will still be able to view and manage the page/post inside WordPress. This provides a safety net for you in case you need to republish the post/page.
You can also expire the page/post by choosing "Trash" or "Delete." Both options will permanently delete the page/post and it will no longer be available on the page/post list. Finally, you can expire the page by making it Private.
We do not recommend using the other options available in the dropdown.
Step 3
To save and enable your expiration, scroll back up to the Publish metabox and click on Publish (if you are creating a new page/post) or Update (if you are updating a page/post).
Related articles
| Filter by label (Content by label) | ||||||||||||||||||
|---|---|---|---|---|---|---|---|---|---|---|---|---|---|---|---|---|---|---|
|