Resize and Crop an Image
- Rachel Klingler
There are times when it is useful to re-size images. For example, displaying a set of images next to each other, or in an image carousel. Often, using the "thumbnail" option will work, but resizing manually will give you more control and avoid aspect ratio and cropping issues like a stretched out look or the top of people's heads being cut off.
Before you begin editing your images, decide on an aspect ratio and size you want all of your images to be.
Crop and force an aspect ratio
If all of your images are already the same aspect ratio, skip to the resizing step. However, if your images are not the same aspect ratio, you will first need to crop the image to the correct ratio.
- First upload the image to your media collection. From the Media Library, select the image you would like to edit.
- From the Attachment Details page, choose the Edit Image button found below the image.
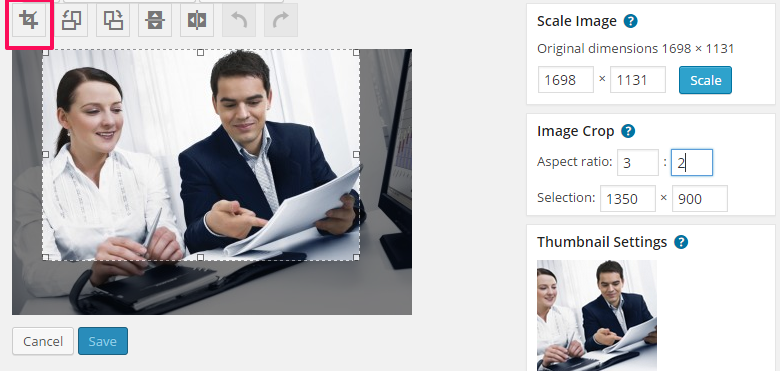
- In the Image Crop box on the right, input your chosen aspect ratio.
- Then, holding down the shift key to preserve the aspect ratio, make the selection of the image you want to crop. Once you make the selection, you can drag the selection around the image to choose the part of the image you want to select. In the Image Crop box, you can watch to make sure that the selection size in pixels is larger than or equal to your desired final size. When you are happy with your selection, choose the crop button (highlighted in the screenshot below) to make the crop. Now, you can scale the image (instructions below) to force it to the standard size. You may need to save the cropped image before scaling it.
Standard Aspect Ratios
- For Wisconsin Featured Images should be 9:5
- Office Snapshot Leadership and Staff photos should be 7:10
Resize the Image.
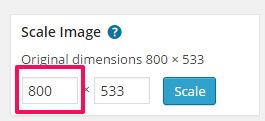
In the Scale Image box, type the width you would like your image to be. The Height will be automatically calculated to preserve the aspect ratio. Choose the Scale button.
Related articles